How do I install Cyber Guardian on MacOS?
Cyber Guardian can be installed on Mac via graphical installer or unattended.
You can check supported MacOS versions here.
Graphical installation (GUI)
In order to install Cyber Guardian protections on your Mac via graphical installer, download it from your download area* or, if “send by email” was selected, from the email received by pressing the Download for Mac button.
*To access your download area, press the View Installers button or enter the https://**.cyberguardian.tech/client/device-security/installers route, replacing ** with your regular Cyber Guardian subdomain.
Drag and drop Cyber Guardian installer into the Applications folder.
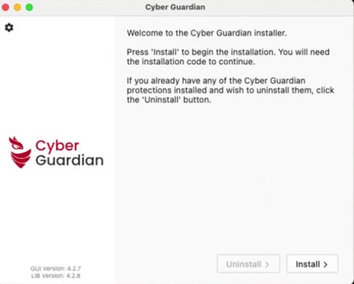
Cyber Guardian installer opens. Press Install to continue.
Cyber Guardian requests the activation code. Insert the code assigned and click on Next.
If you do not have an installation code, find out how here.

The installer then presents the installation options available according to the token entered. If the token included both protections, you can select one or both.

The download and installation process will then begin, during which device and/or navigation protection agents will be downloaded and installed, depending on the previous selection, and your Mac will prompt you several times for your password to authorize changes to your computer.
Device Protection installation
For device protection installation, the Privacy and Security window will open. Click Allow to allow monitoring network activity and enter the password when required.

If you receive a message like this indicating that there are blocked system extensions press OK as these extensions will be configured later.

Activate corresponding protection extension and click OK

Cyber Guardian will continue automatically to registration.

Registration ends in a few seconds. Click on Close to finish the installation.

The last step is to grant Full Disk Access. This step is essential and necessary to protect your information and your computer.
To do this, please select the device protection agent in the Applications folder.

Click on Configure Settings

Click on System Settings

And activate Full Disk Access.

The next window will confirm that Full Disk Access is granted

Finally by selecting the device protection agent from Applications, you can verify that it is now fully operational.

The process of installing device protection is ended now.
Navigation protection installation
In the navigation protection installation process, you will receive a message like this, click Allow to allow adding proxy settings:

Activate the corresponding extensions and press OK

A few seconds later the registration process ends. Press Close to finish the installation.
Unattended installation (CLI)
If you prefer to perform unattended installation on Mac download the unattended installer from your download area.
You can run the unattended installer for Mac via command line like this, depending on the different protections availability for the inserted token (installer versions after 4.2:):
sudo ./cyberguardian_cli install [device-protection|web-protection|all] [token]

For backwards compatibility, existing customers can use old syntax (installer versions earlier than 4.2) which will install both protections if available in the token (all):
cyberguardian_cli [token]
WARNING: Future releases won’t support this execution. Please change to Install command.
Note: at the end of the installation it will be necessary to activate the system extensions on the installed devices.
For more information on the installer exit codes by command line click here.